A course contains a series of topics that are like ordered lessons (or sections). A course can be equivalent to a university course, a skill, or a even a book. In addition, a course can also have its own assessments.
Note: We highly recommend to check our example tutorial in order to get a general insight about eDoer, before start reading this page.
Table of Content
Create a Course
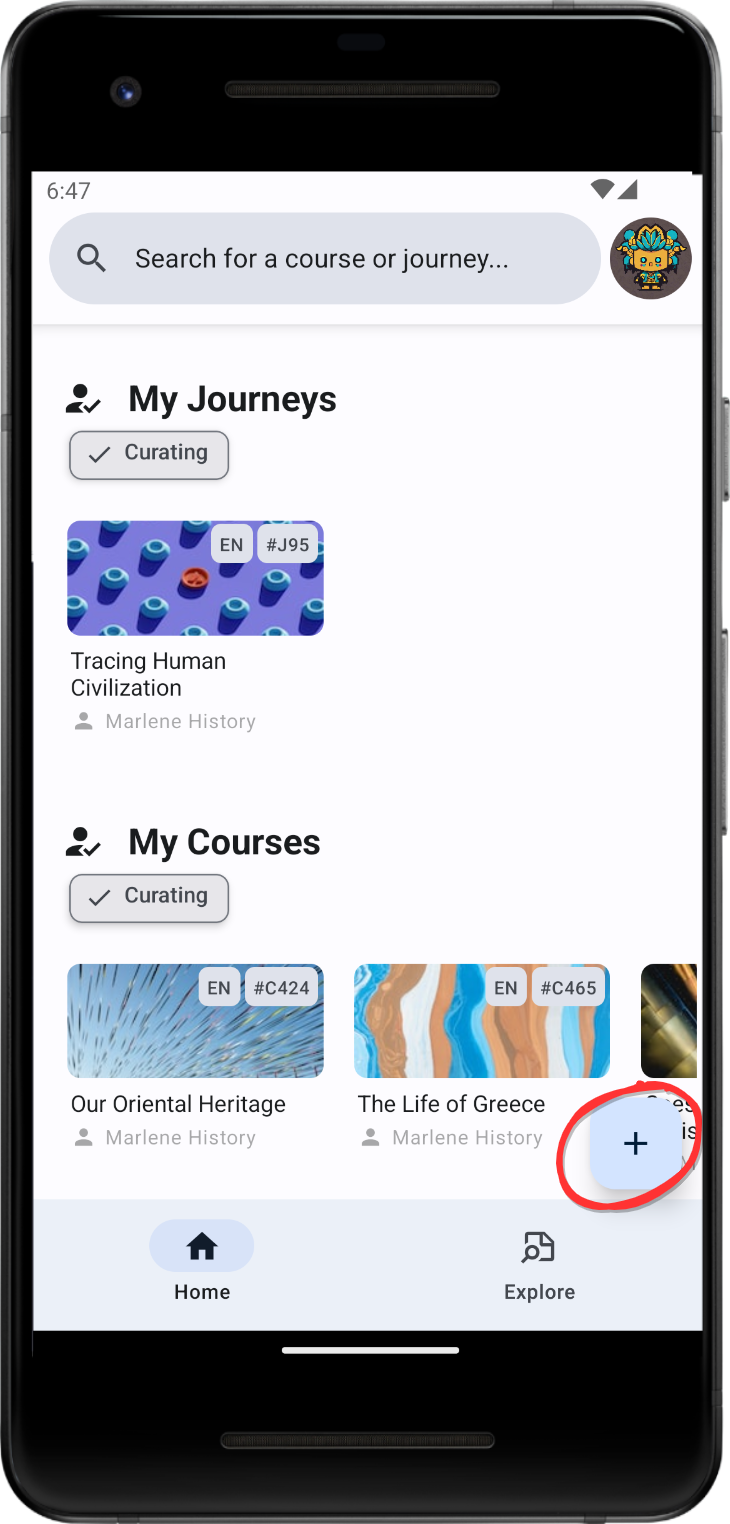
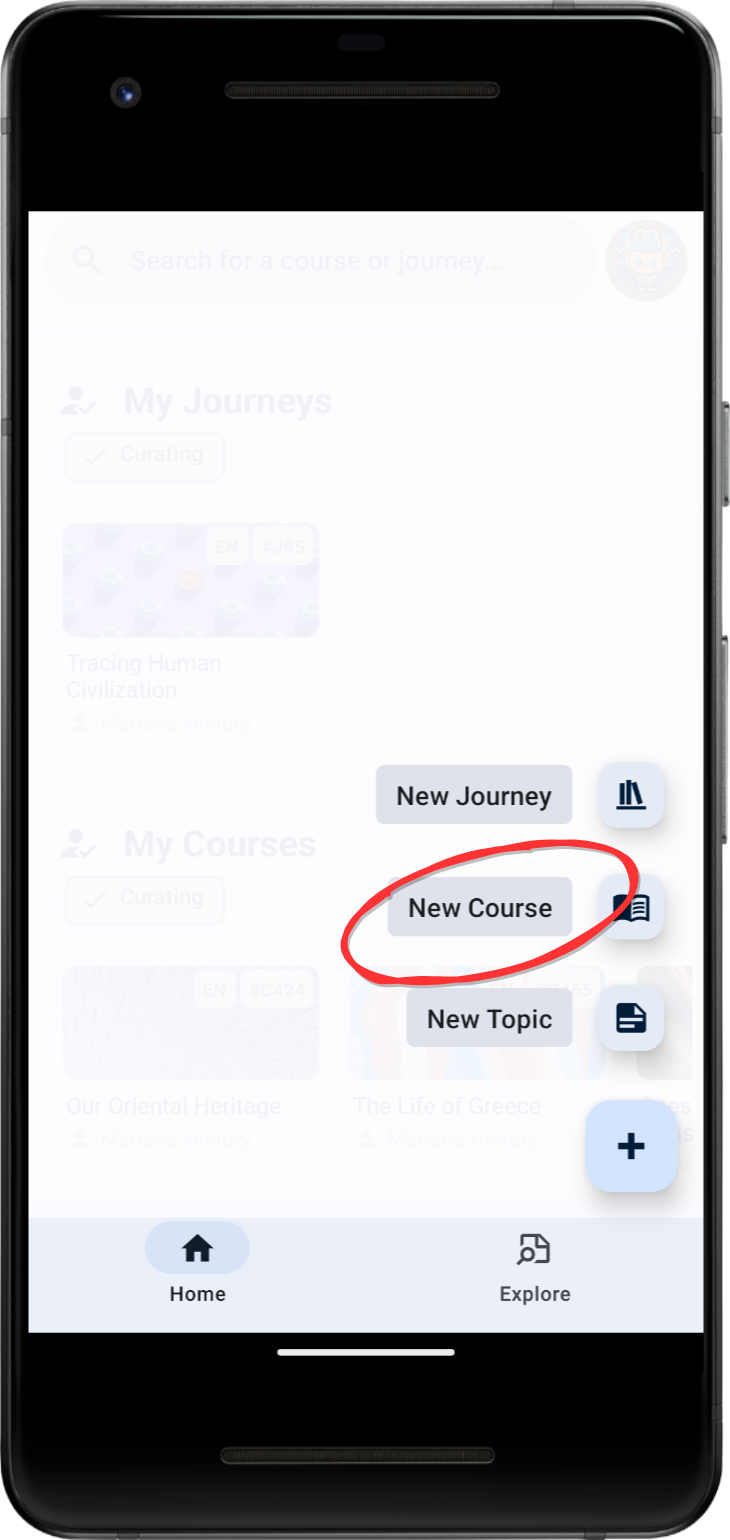
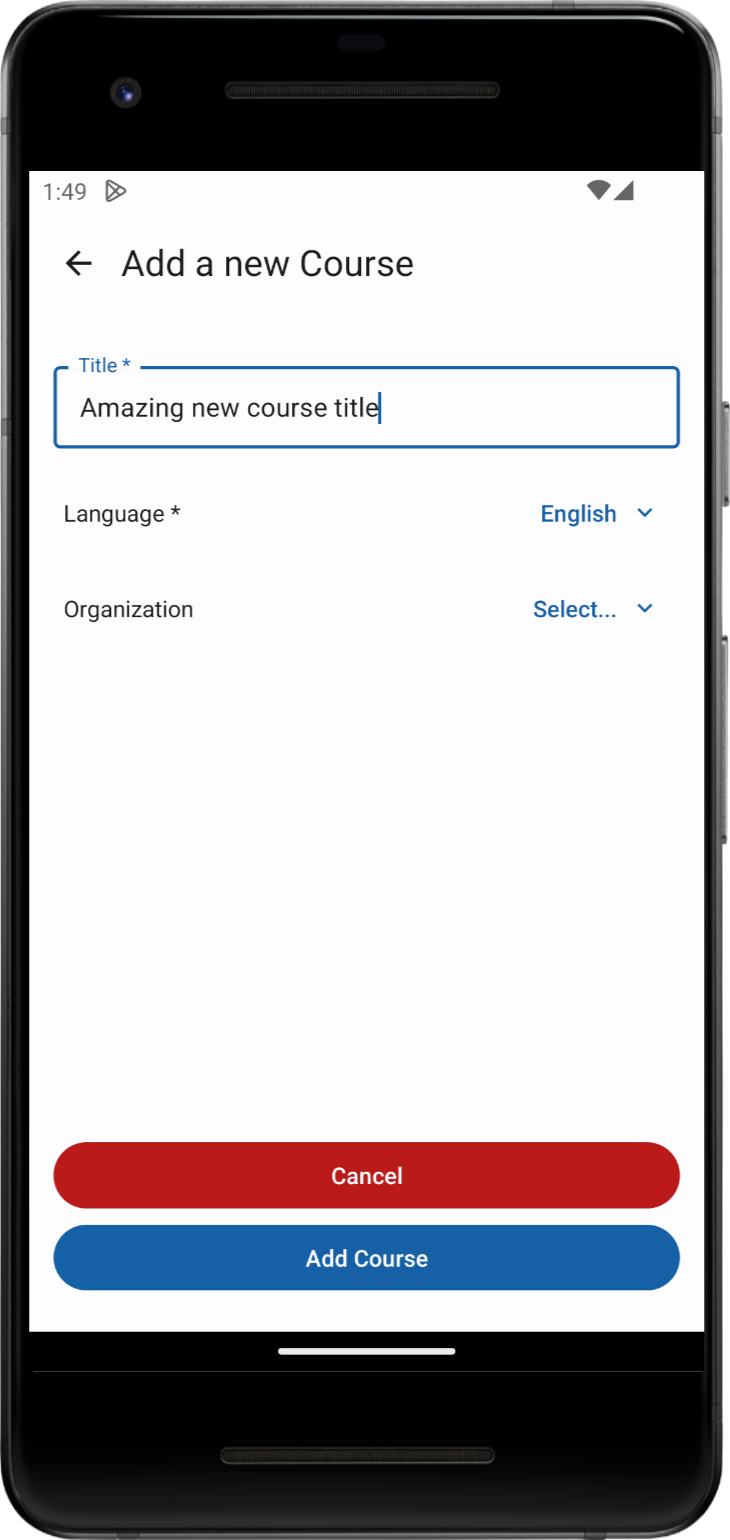
Locate the “+” icon situated at the bottom right of the application, simply click on it. Upon doing so, you will encounter an option labeled “New Course”. To successfully add a course, provide the necessary details such as the course title, choose the language, and specify any relevant organization affiliation (optional). Once these parameters are configured, proceed to click the “Add course” button.
For a visual walkthrough of this process, check the accompanying video. Additionally, in subsequent sections of this tutorial, we will explore how to edit the courses you have created.
Note: We strongly advise selecting a descriptive title for your course that effectively encapsulates the material taught within it. This practice not only enhances topic recommendations but also makes it easier for others to discover your course through search functionality.
Course homepage
A homepage of a course looks like this. The tab bar, highlighted in red, displays various tabs that enable users to make changes to topics, course information, assessments, and collaborator permissions. The nav bar, highlighted in blue, displays course sharing and publishing.
The course homepage also features a dashboard, providing the content curator with statistics about the course learners. In addition, it offers insights into course topics and course status.
- Viewing a dashboard with statistics about learners.
- Finding the actions which need your attention (topics without resources, access requests, etc.).
- Viewing the list of topics covered in the course.
- Rearranging the existing topics or adding new topics on the “edit” mode.
- Direct adding resource-sets to the topics of the course.
- Viewing the course code, along with general details like language and title.
- Editing course information like title, description, and learning outcomes. Note that this information is crucial for our recommendation system, so it is essential to input relevant details.
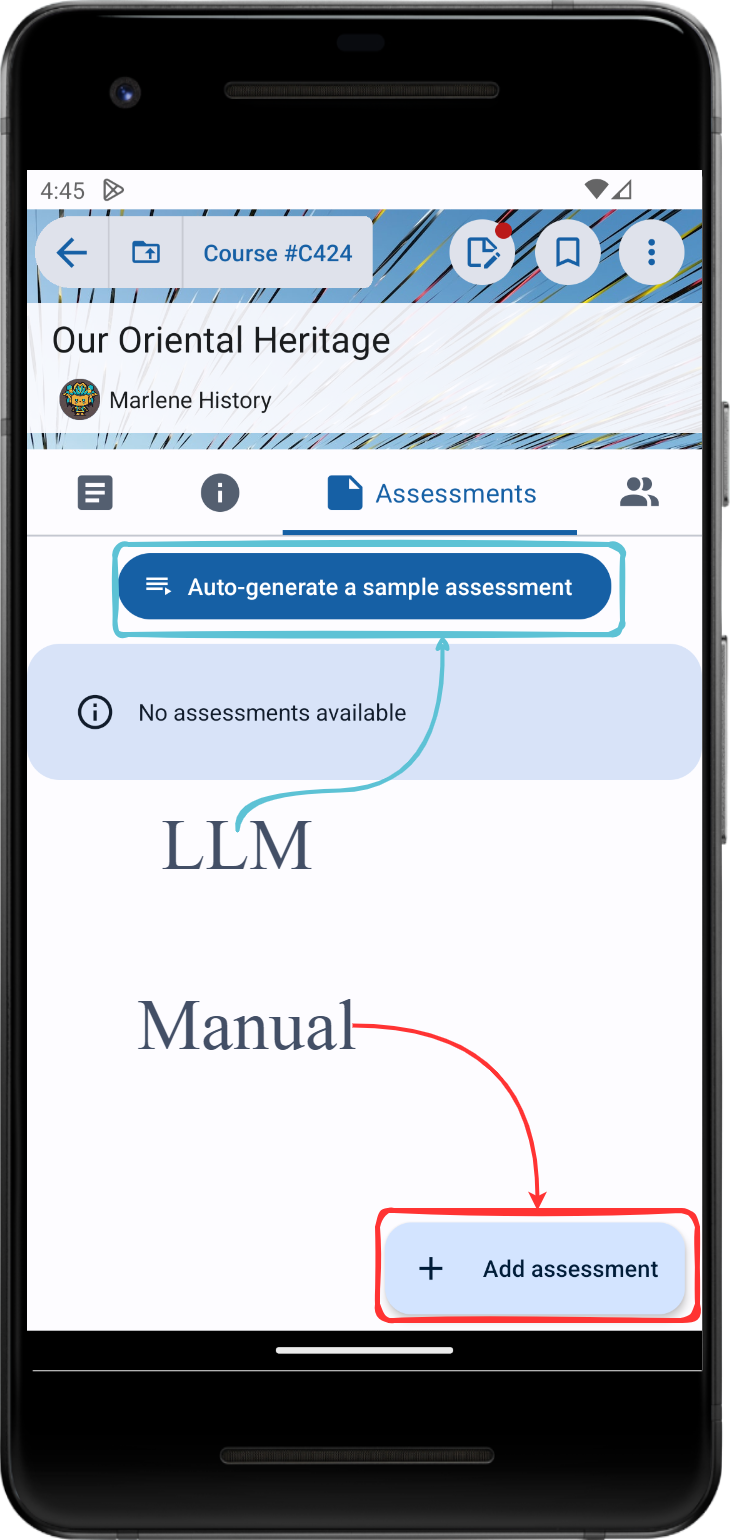
- Viewing the list of assessments.
- Auto-generating assessments according to the topics of the course.
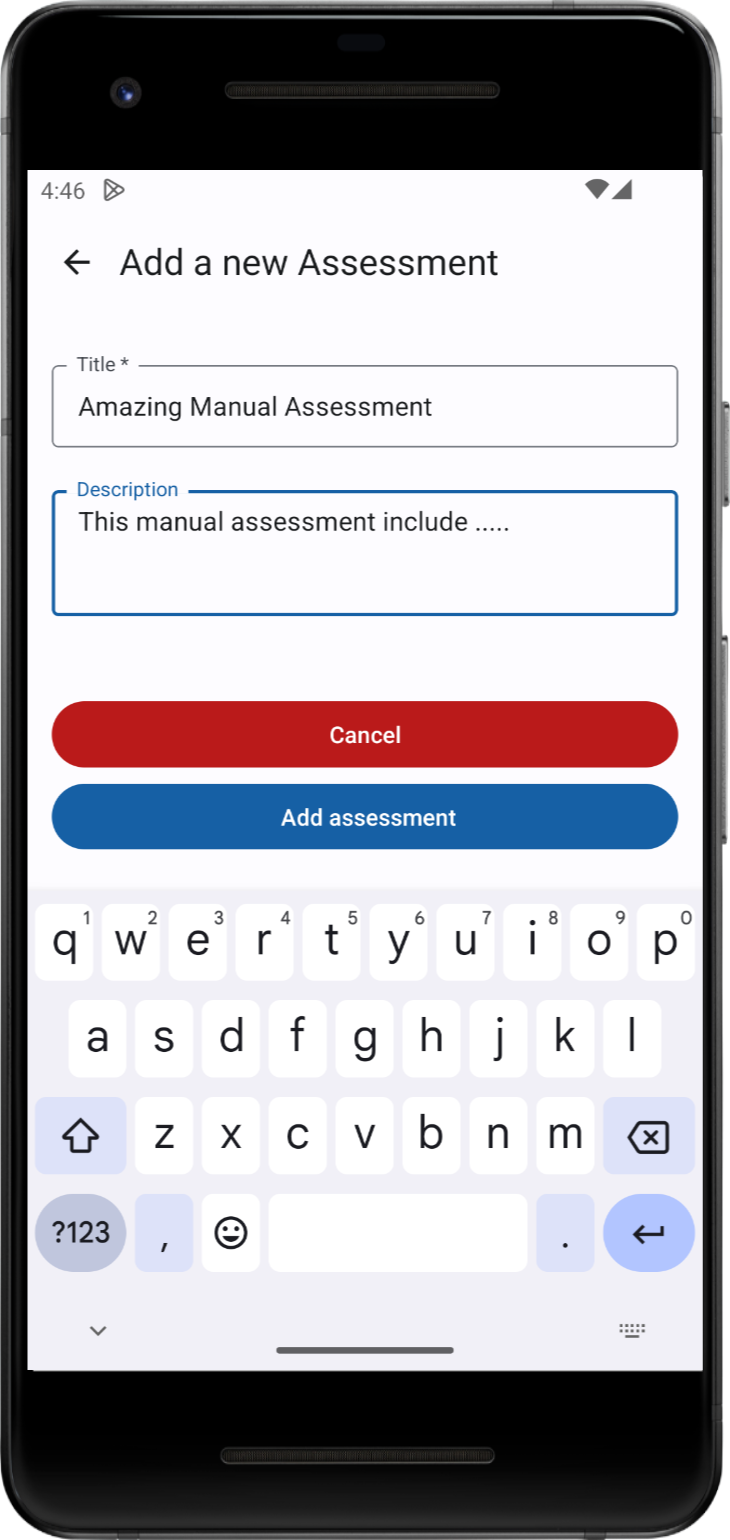
- Adding assessments manually using the “Add Assessment” button.
- Viewing all owners/editors of the course.
- Inviting other users as editors using the invitation link.
- Deciding about pending editor access requests.

Navigation bar
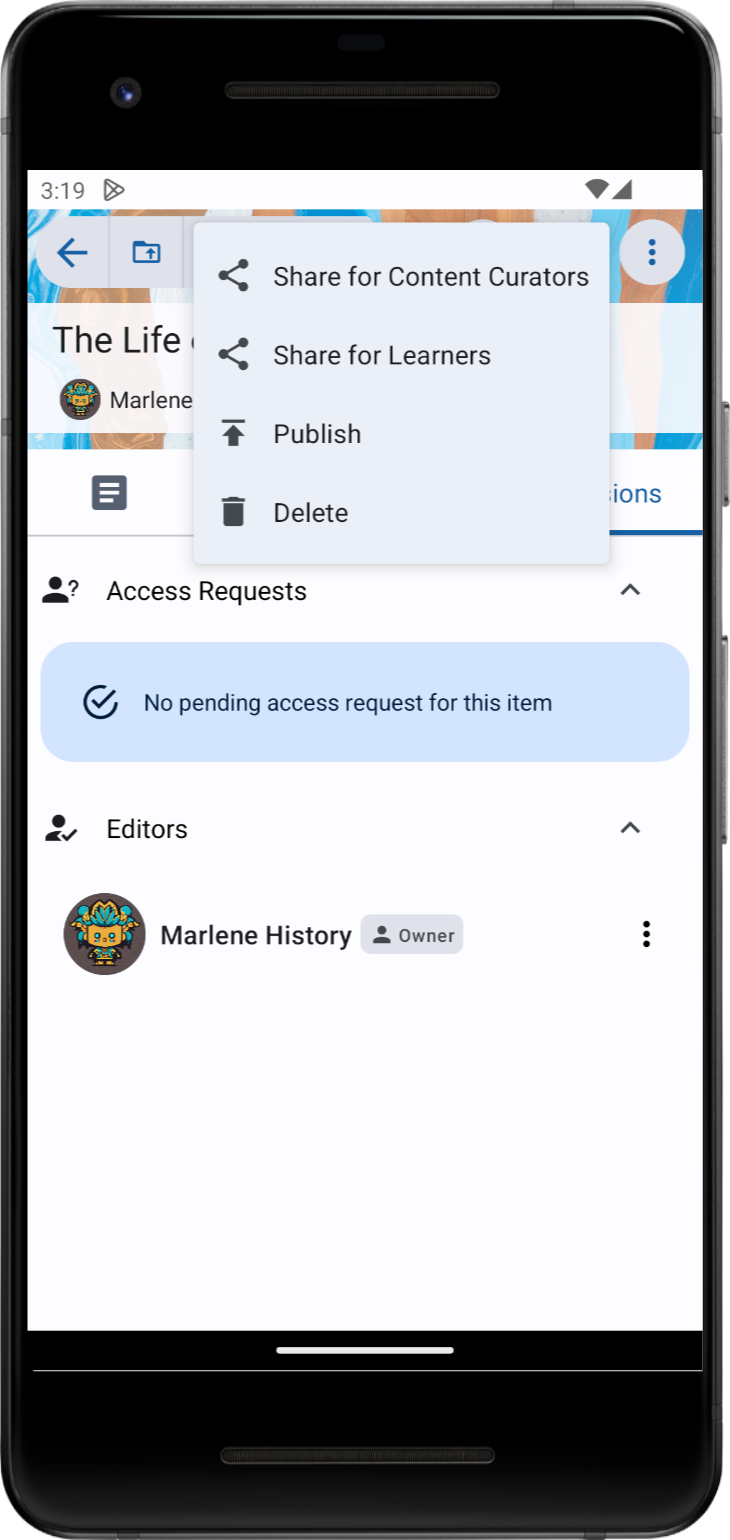
At the top of the interface (highlighted via blue), there is a bar that provides key information about the course. This includes details such as the course code, the journey it is associated with (if applicable), and convenient access to the journey itself. Additionally, this bar offers a feature enabling users to obtain a shareable link, accessible by both learners and curators. Notably, essential buttons for deleting and publishing the course are also situated here. The publish function is vital as it ensures the course becomes visible in the learner app, allowing individuals to select and engage with the content.
- Displays essential information like the course code and journey association.
- Provides easy access to the associated journey, if applicable.
- Features a sharing option, allowing users to generate a link for both learners and curators.
- Includes buttons for deleting and publishing the course.
- The publish function ensures visibility in the learner app, allowing users to choose and engage with the course.
Edit Course Information
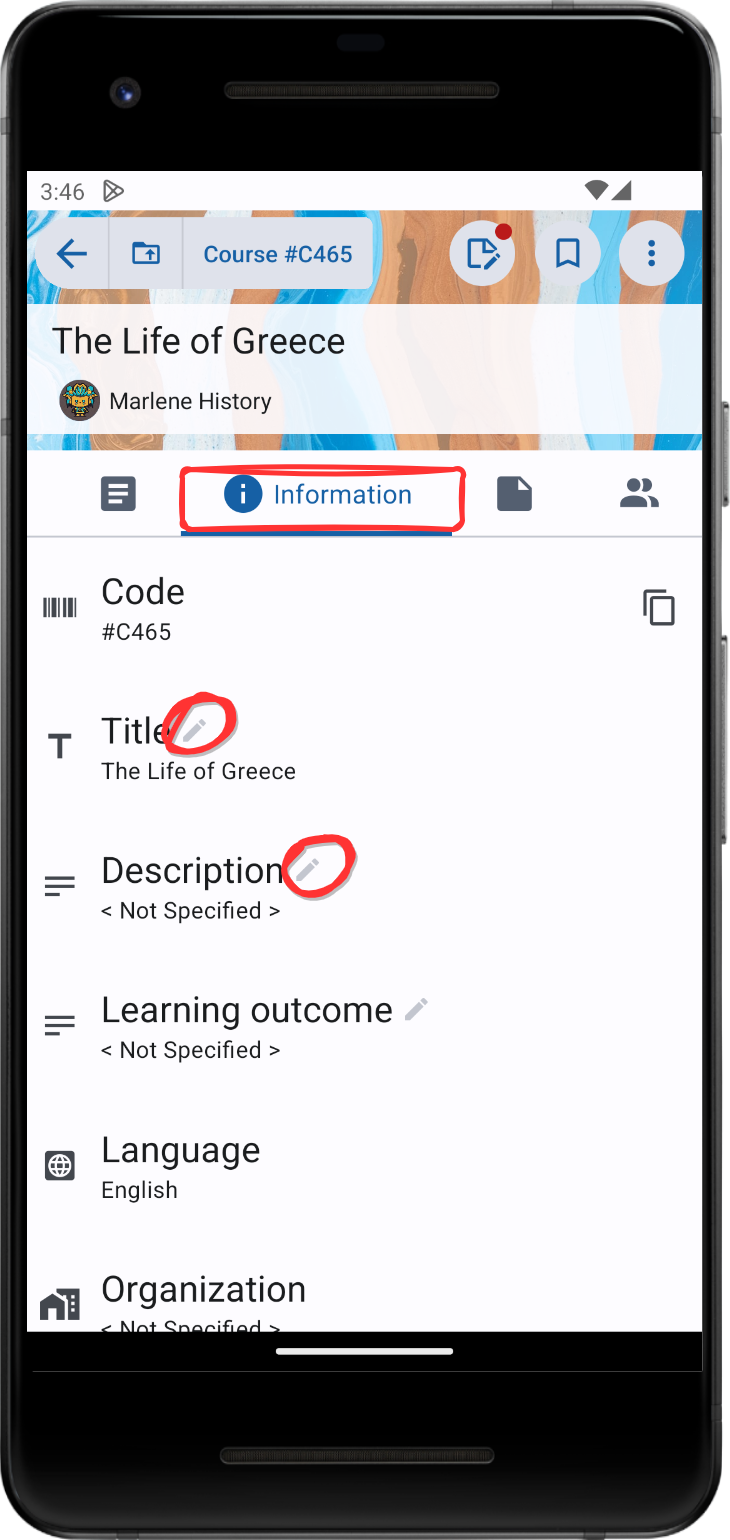
To modify the course title, description, learning outcome, or other properties, follow these steps
- Navigate to the Information tab by tapping the exclamation mark icon.
- Ensure you have the necessary permissions to make adjustments.
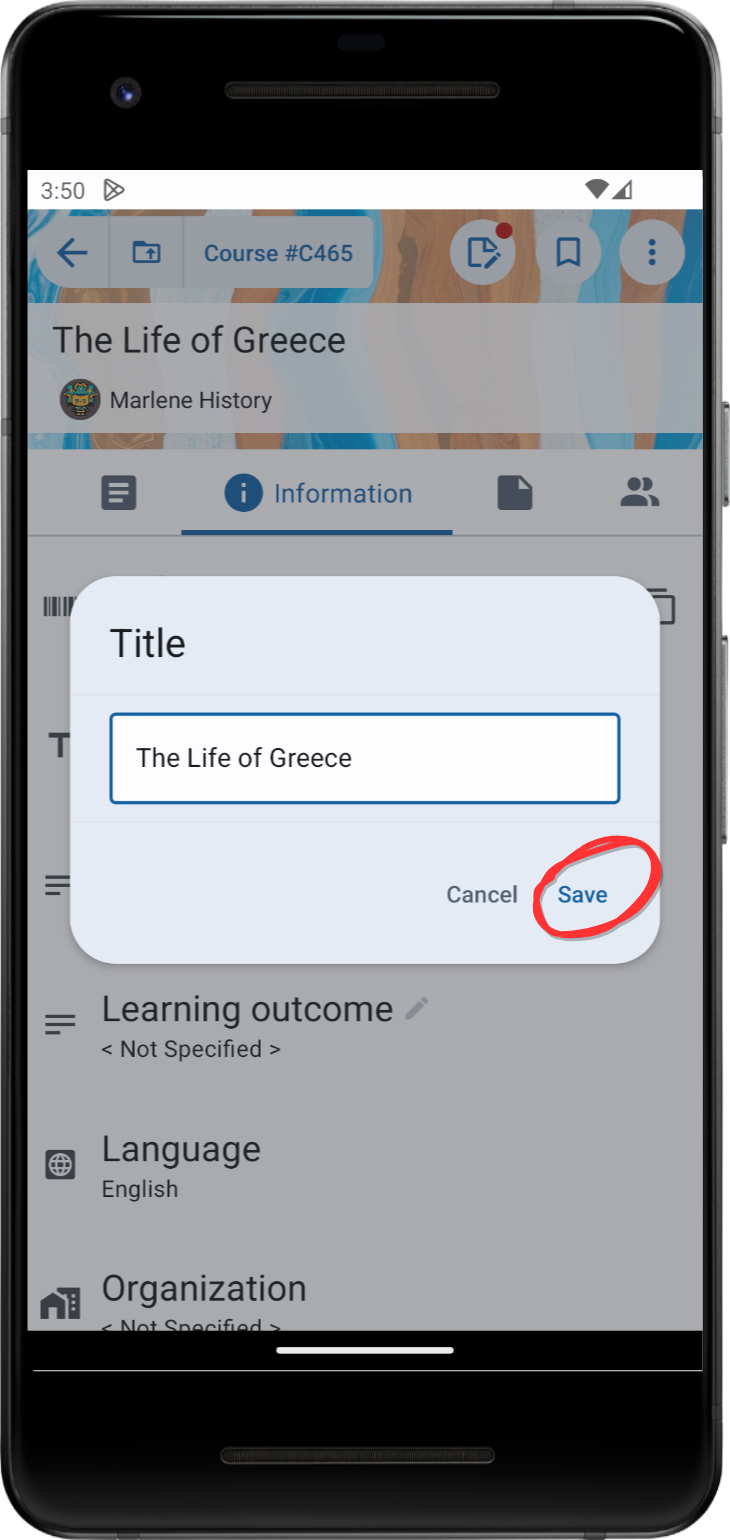
- Touch the pencil icon, input the new value, and click save to implement changes.
- Don’t forget to click save to confirm and apply the modifications.
Topics
Topics serve as the fundamental building blocks of the course, and for a detailed definition, refer to concept guideline. Emphasizing the significance of the course title, it plays a crucial role in maximizing the effectiveness of our AI tools. The importance lies in the fact that our AI tools rely on the course title to generate topic recommendations. Therefore, an informative course title is essential for maintaining high-quality recommendations; a less informative title may adversely impact the recommendation accuracy. The upcoming sections will guide you through the process of adding topics using various tools available in our system.
Add a new topic
Begin by navigating to the “Topics” section in the tab bar. Next, click on the “+” icon, and then select one of the following options:
- Manually, add a new topic
- Add an existing topic
- Utilize AI tools to generate a new topic
Additionally, the following three videos demonstrate the different methods of accomplishing this task (refer to the example tutorial for more information).
It is worth mentioning that curators can only add an existing topic to the course if they are the owner of the topic.
Manual
Reuse
AI
Assessments
You have the option to generate assessments for learners through our automated tools, utilizing LLM technology to craft questions based on your topic titles.
It’s important to note that the resources associated with the topics are not considered in the assessment generation process. Alternatively, for a more tailored approach, you can manually add your assessments.
Share a Course
After you create and publish your course, you can share it with other content creators and/or learners.
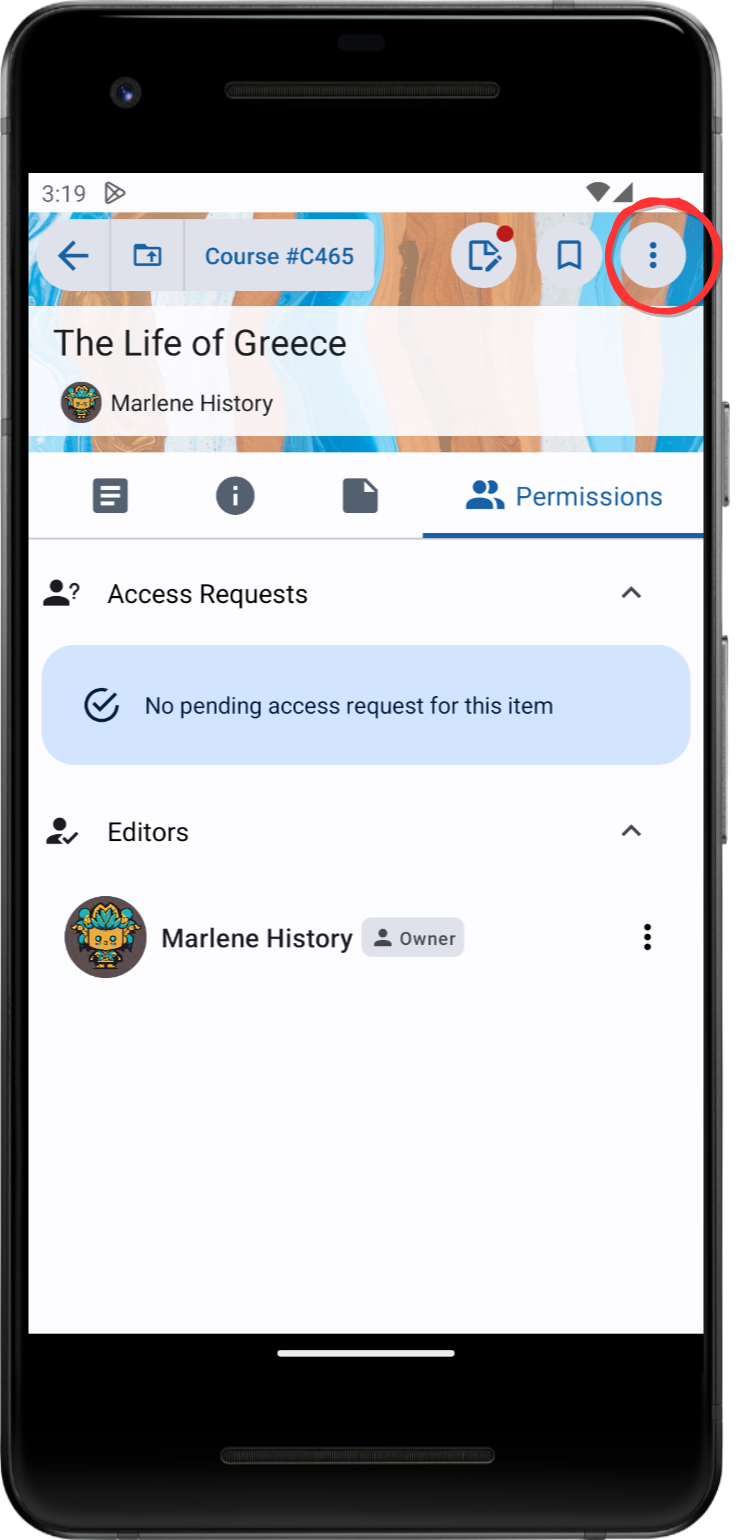
Simply, tap the three dots, located on the upper right corner of the course’s homepage, and choose “Share for Content Curators” or “Share for Learners”.
Delete a Course
You created a course, but it’s not fitting to your original idea? You can delete it and start fresh. Tap on the three dots, located on the upper right corner of the course’s homepage, and choose Delete on the menu that shows up. Tap Yes to confirm and now you can start again from scratch.
