
A journey serves as a space to package multiple courses that share common objectives or themes for learners. In addition to separate course assessments, a journey can also have its own assessments.
Note: We highly recommend to check our example tutorial in order to get a general insight about eDoer, before start reading this page.
Table of Content
Create a Journey
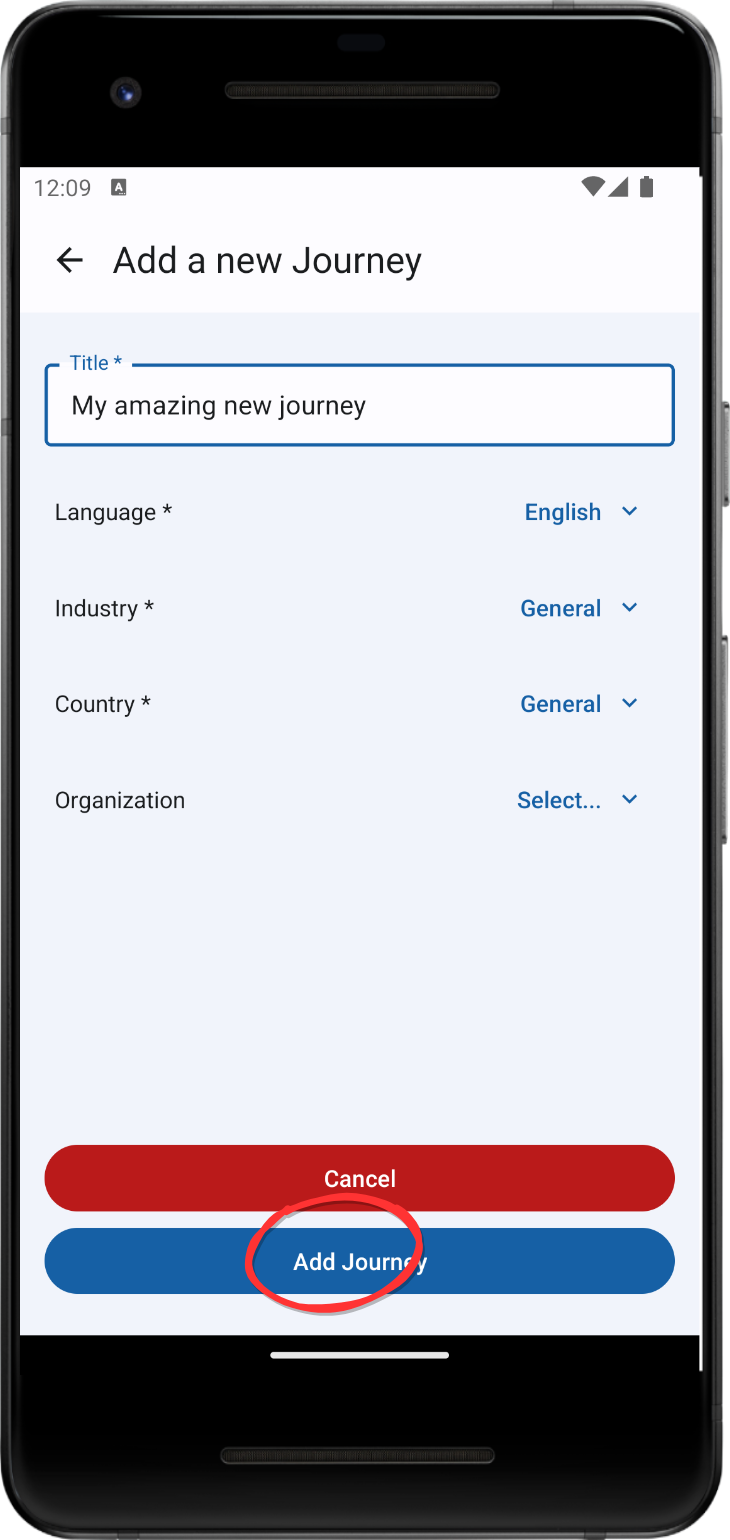
To create a journey, it is essential to have a proper title, which is a mandatory field to be filled by the curator. Additionally, there are other properties such as language, industry, country, and organization, that need to be completed. These properties come with default values that can be left unchanged or modified to align with your the goal of your journey.
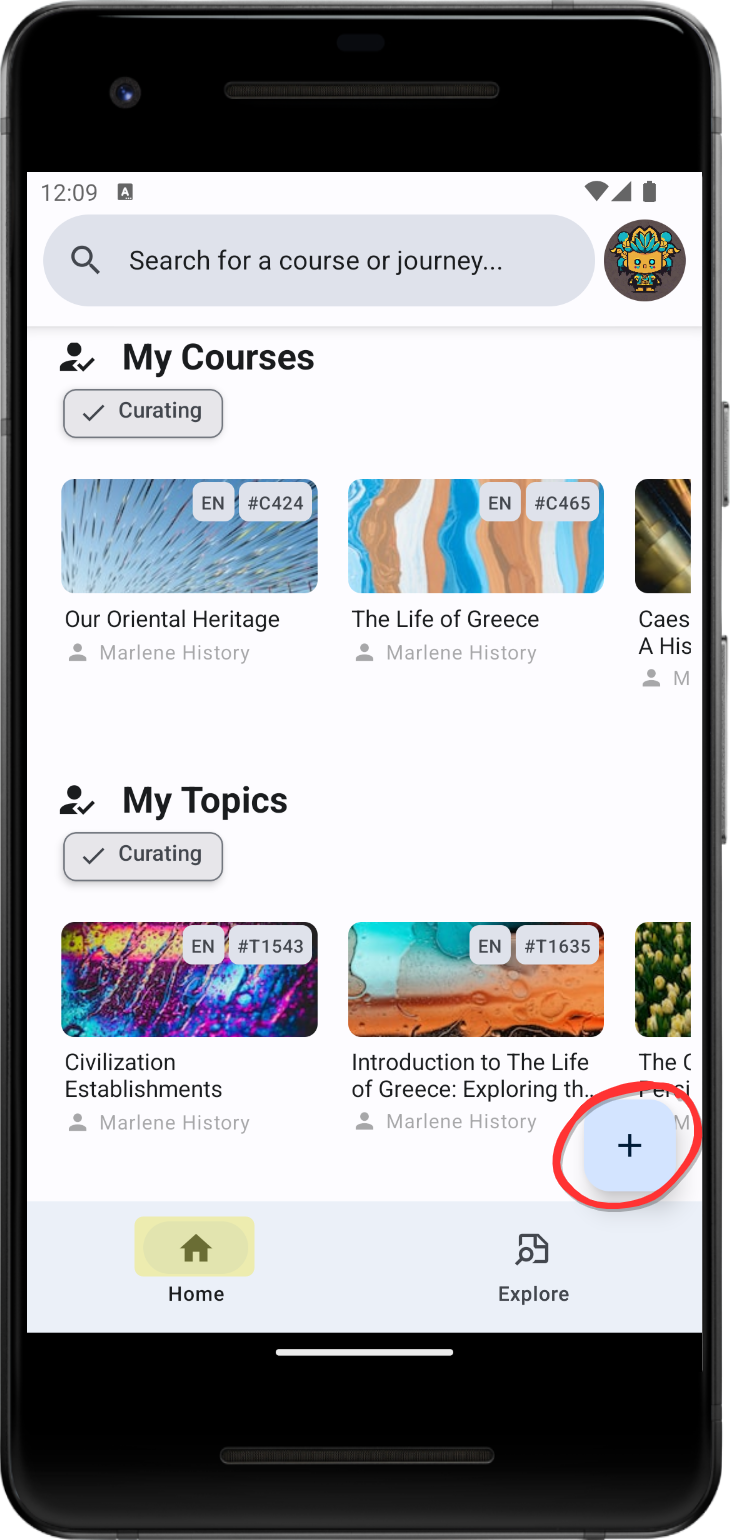
Creating a new journey is very easy. From the home tab, tap on the “+” icon in the bottom right and select “New Journey.” Then, set the values as desired and click on “Add Journey”.

Delete a Journey
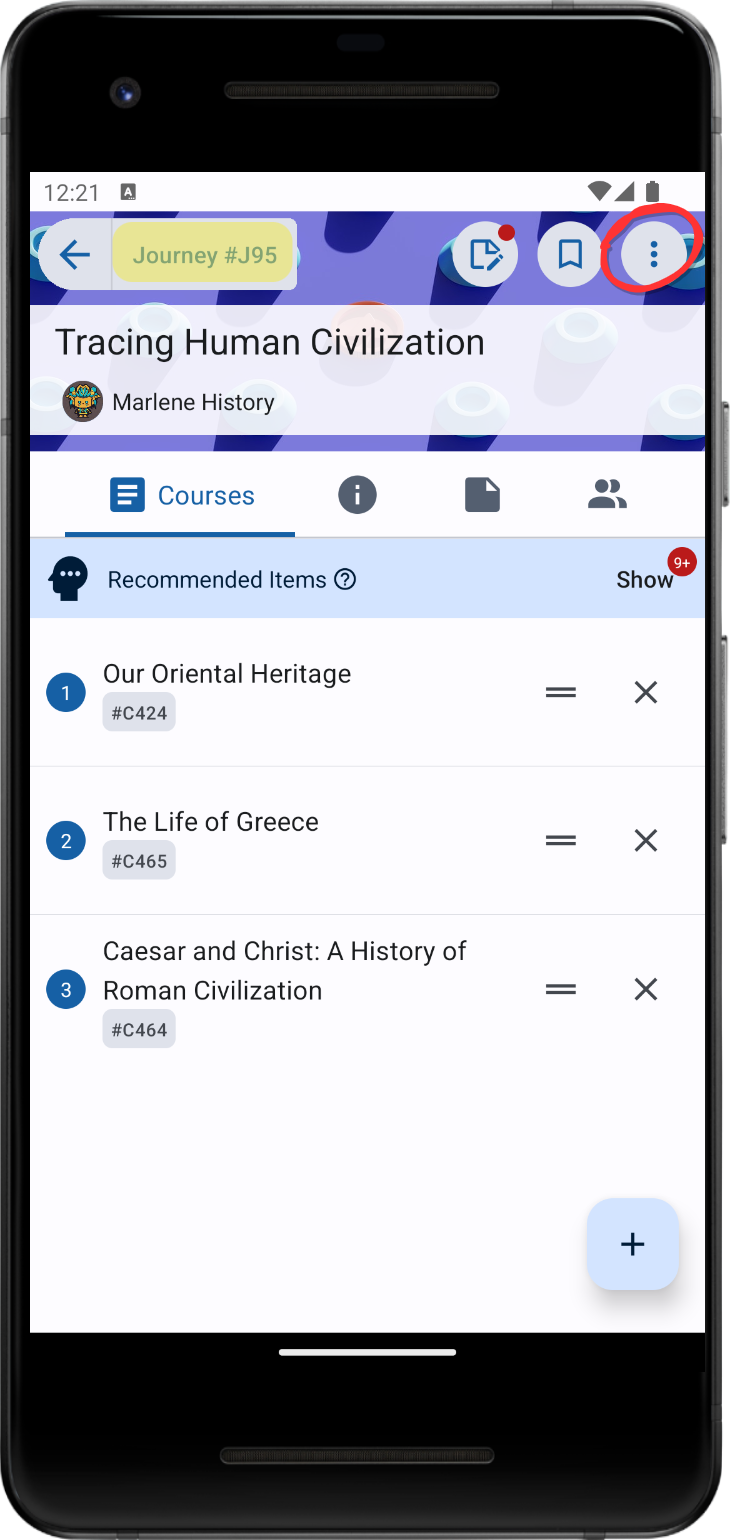
To delete a journey, start by navigating to the homepage of the specific journey. Then, from the top-right menu, select “Delete” as illustrated. It is worth noting that journeys can only be deleted as long as they have no learners (except the owners/editors of the journey).
Share
From the same top-right menu, you also have the option to generate a link that can be shared with learners or curators.

Journey Home page
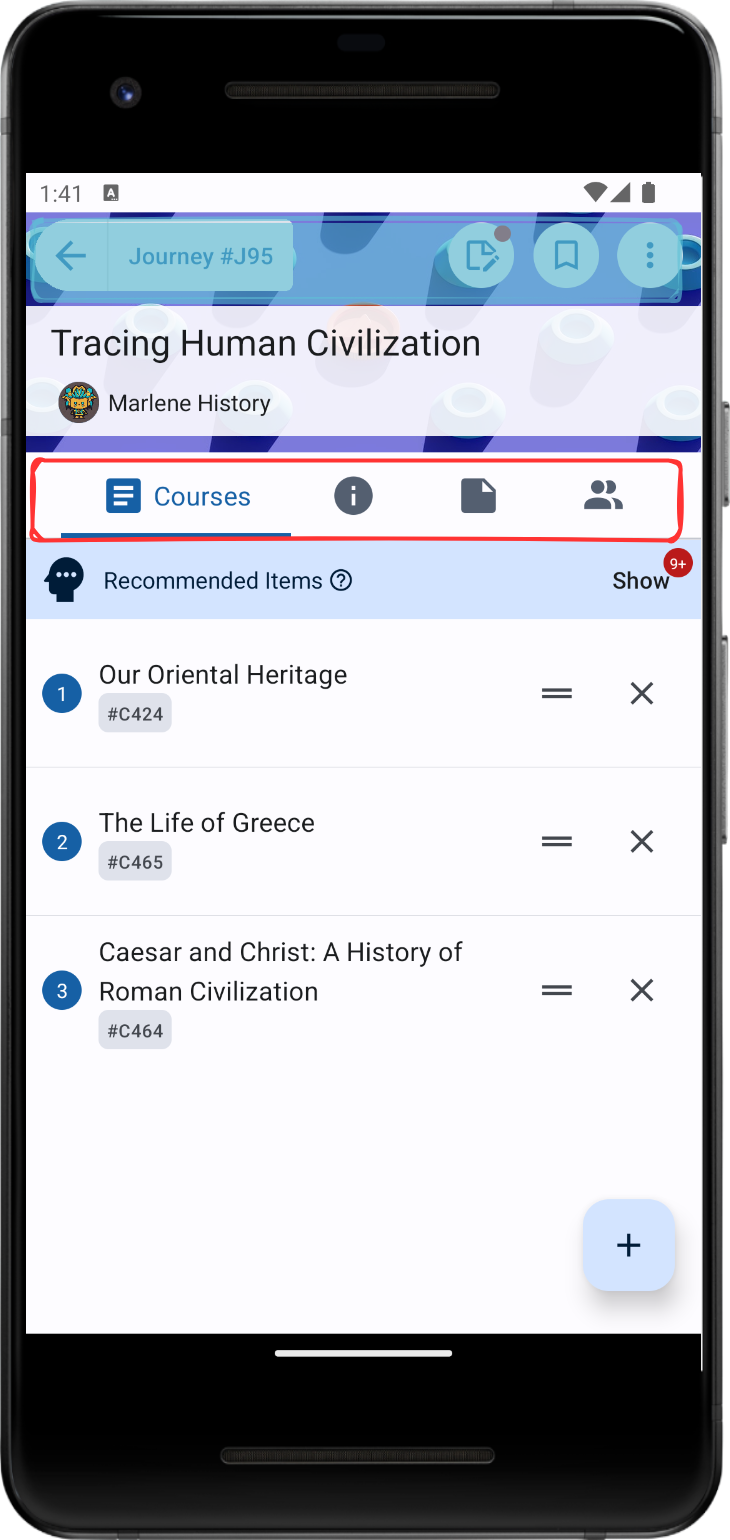
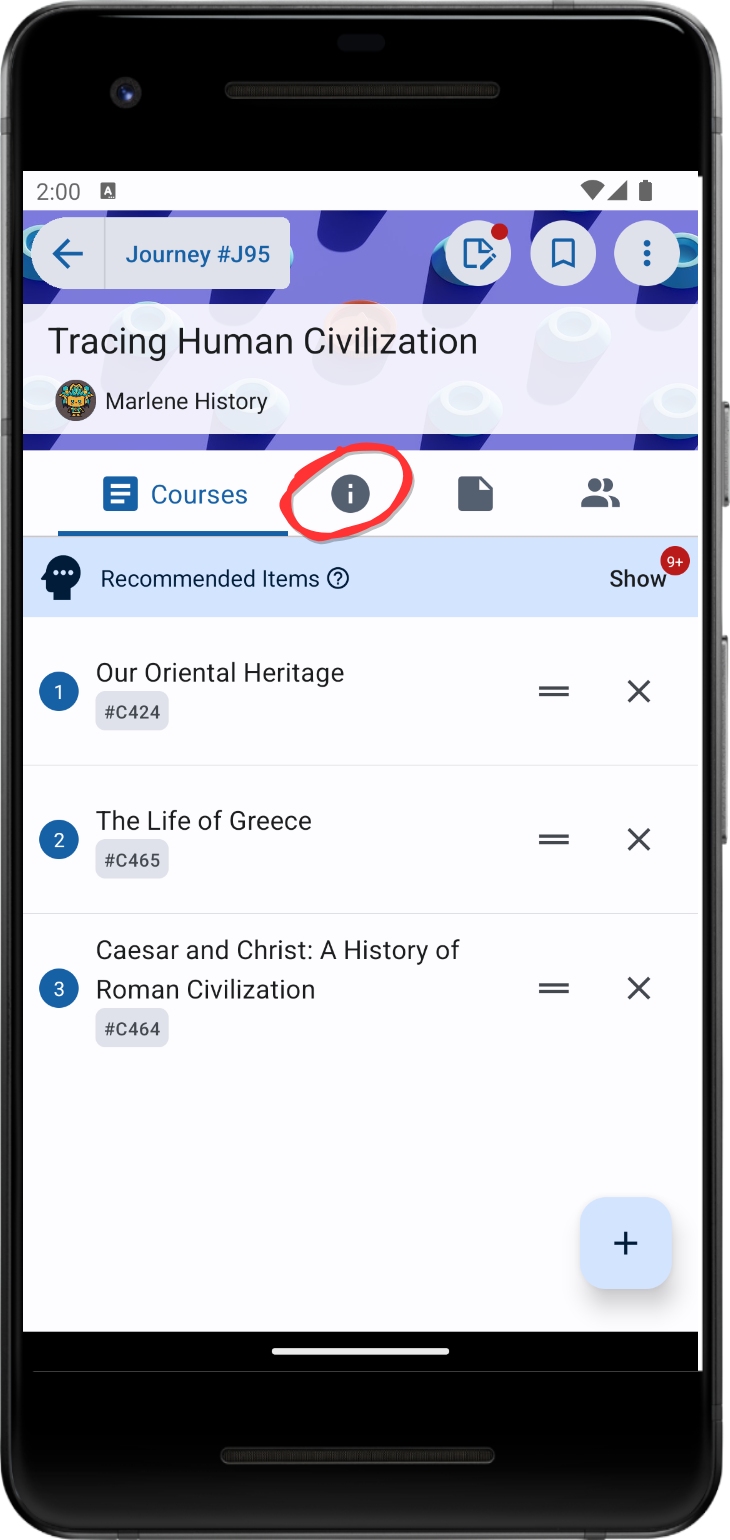
The Journey homepage comprises a highlighted tab for navigation, indicated by red. The following explains each of the tabs, with detailed instructions to follow. In summary, this is the space where you can add or edit courses and rearrange the courses within the journey. Additionally, there are other features such as creating assessments and managing permissions, all accessible via the tab bar. On the right, we showcase an example journey titled “Tracking Human Civilization.”
- Viewing the courses currently included in the journey.
- Rearranging the order of the courses or adding new ones on the “edit” mode.
- Viewing the details of the journey such as the journey code.
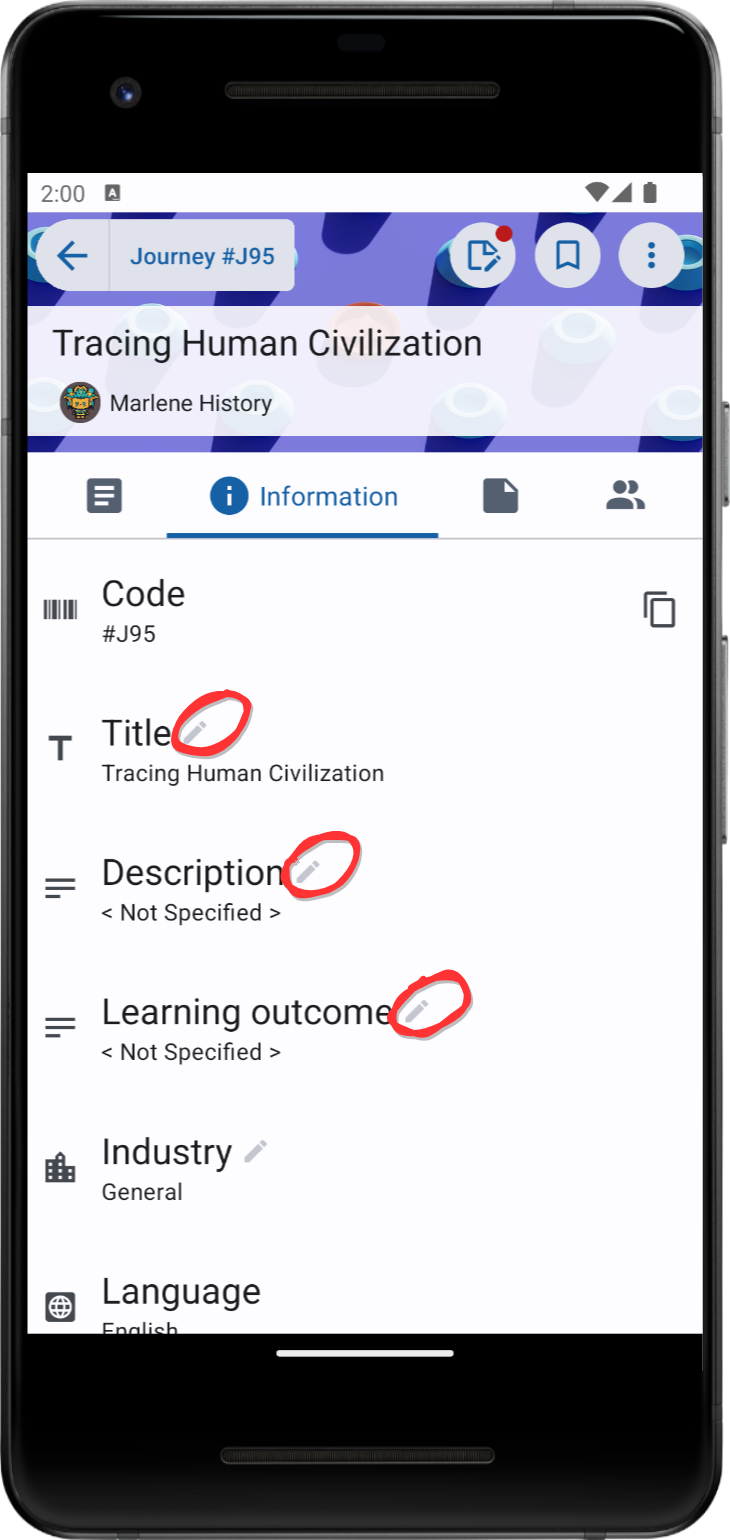
- Editing journey information, like title and organization. Note that this information is crucial for our recommendation system, so it is essential to input relevant details.
- Viewing the assessments which have been created in the journey.
- Creating new assessments manually.
- Viewing/Managing all owners/editors of the journey.
- Inviting other users as editors using invitation links.
- Deciding about pending editor access.
Edit Journey information
To modify the journey title, description, learning outcome, or other properties, follow these steps:
- Navigate to the journey homepage.
- Select the “Information” section from the tab bar.
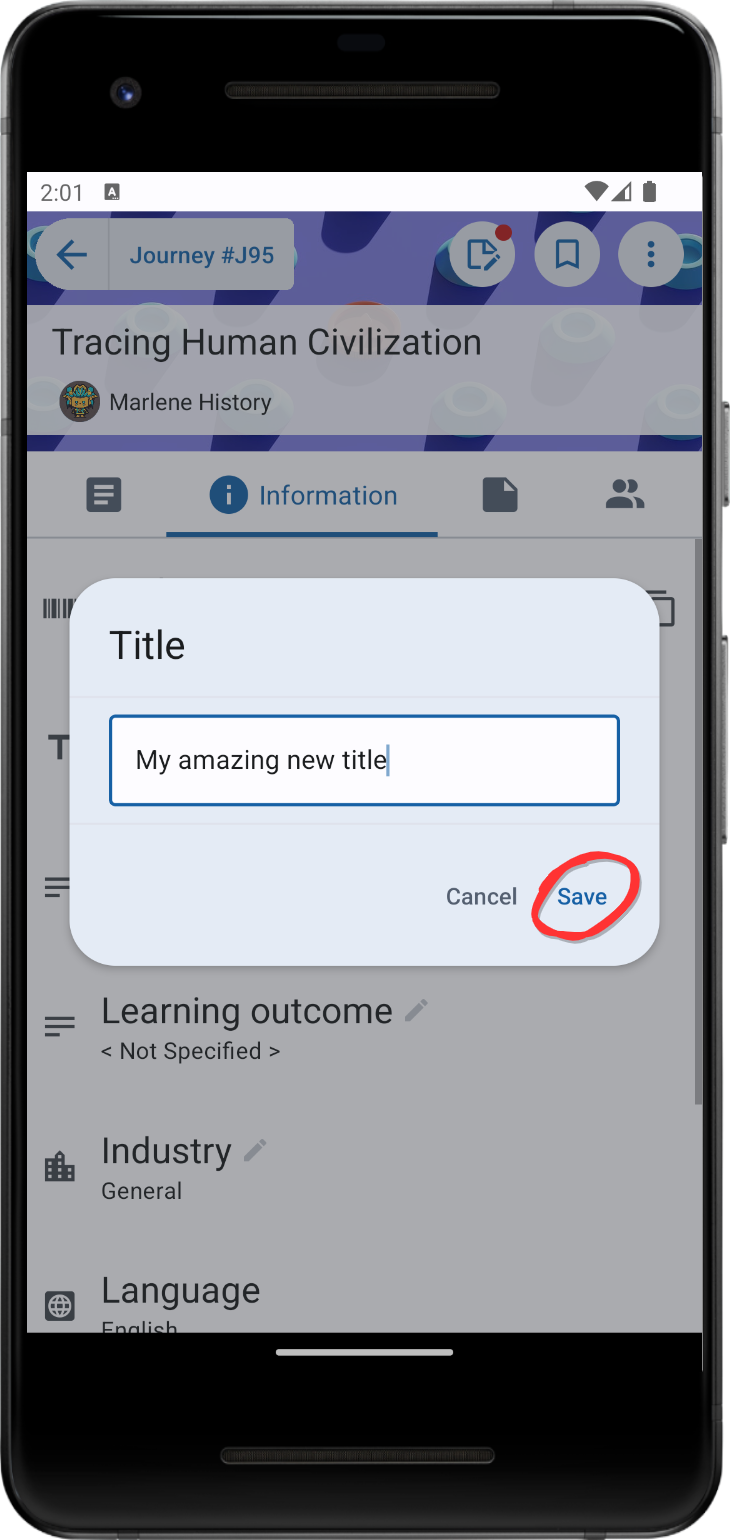
- For each property you wish to change, click on the pencil icon
- Type/Select the new value in the opened box.
- Click on “save” to apply changes
All fields (except the language and organization fields) can be edited by all curators (i.e., editors and owners). Note that the organization field is only editable by owners of the journey, and the language field is not editable at all.
Journey Course Management
On the Course tab, you have the flexibility to either add existing courses that are already created to your journey or initiate the creation of a new course directly. If you choose to create a new course, you can fill in the topics for that course at a later stage. The process for creating new courses will follow the same procedure as explained in the Curate a Course guideline.
Add an Existing Course
To add a course to a journey, click on the “+” sign and then search for your desired course. Once you have successfully found the course, click on it to add it, as illustrated in the video on the right. For example, in the video, we add three courses to a journey titled “Tracking Human Civilization.”
Note that, in addition to adding courses that belong to you, you can also include existing courses from others in your journey.
Course recommendation
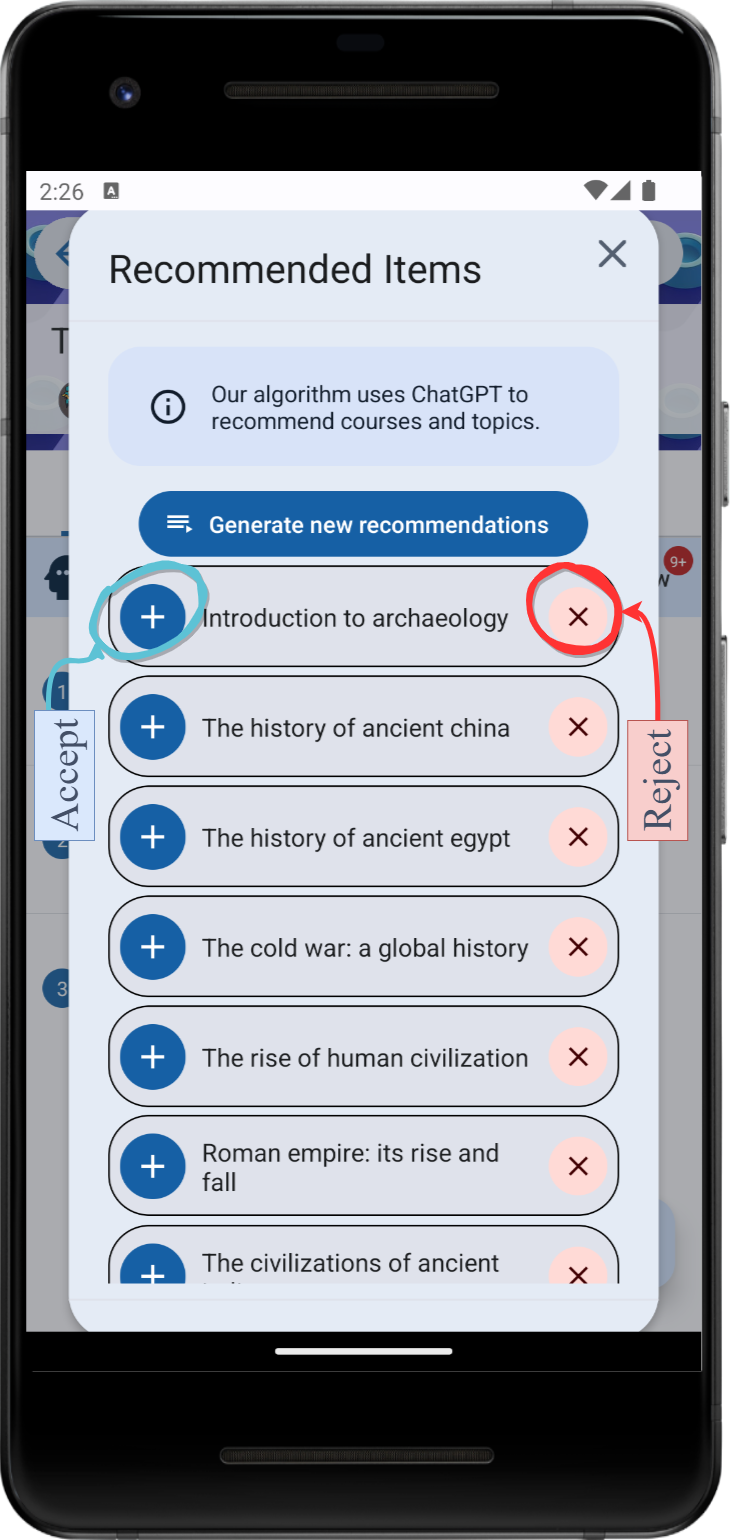
You can also utilize our AI tools to receive recommendations for relevant courses. The quality of the recommended course titles highly depends on the relevance and specificity of the journey information. Therefore, we strongly recommend checking your title, journey description, and other properties in the Information tab to receive accurate recommendations and enhance your overall experience with our app.
To utilize our recommendations, simply click on “Show” under the bottom right of the tab bar, and then you can check the generated recommendations. Also, you can request multiple times to regenerate results. Afterward, select the ones that fit your needs (journey) and create a course based on them.

Assessments
Adding new assessments is quite straightforward. Navigate to the Assessments section from the tab bar, then click on “Add Assessment”. Provide it with a title and description. It’s important to note that Journeys only support manual assessments, and the automatic creation of assessments is not yet supported. This feature is exclusively available for courses.